Creating A Cartoon Character Using Blender 使用blender创建卡通人物
持续时间:1h 42m |视频:.MP4 1280×720,30 fps(r)|音频:AAC,44100 Hz,2ch |大小:1.08 GB
语言:英语+中英文字幕(云桥CG资源站 机译)
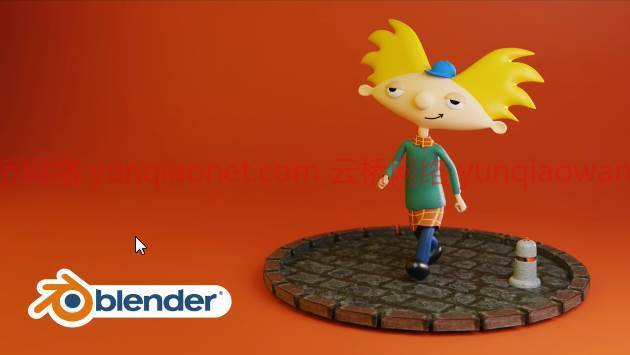
大家好,我叫迪诺,欢迎回到另一个课程。在这门课中,我们将模仿90年代著名情景喜剧《嘿阿诺德!》中流行的卡通人物阿诺德。
该剧以一个名叫阿诺德的四年级学生为中心,他和祖父母住在市中心的一个公寓里。剧集集中讲述了他在处理他和朋友们遇到的问题时在城市生活中的经历。
阿诺德是一个冷静,善良,乐观,乐观,乐观,聪明的理想主义者,他总是看到人们最好的一面,尽管他们中的一些人是多么不友善或狡猾。虽然他通常是一个太平洋孩子,但他有自己的局限性,当他被推得太远时会有点易怒。
首先,我们将导入一个您可以从中获取的参考图像gum.co/ViJhr公司
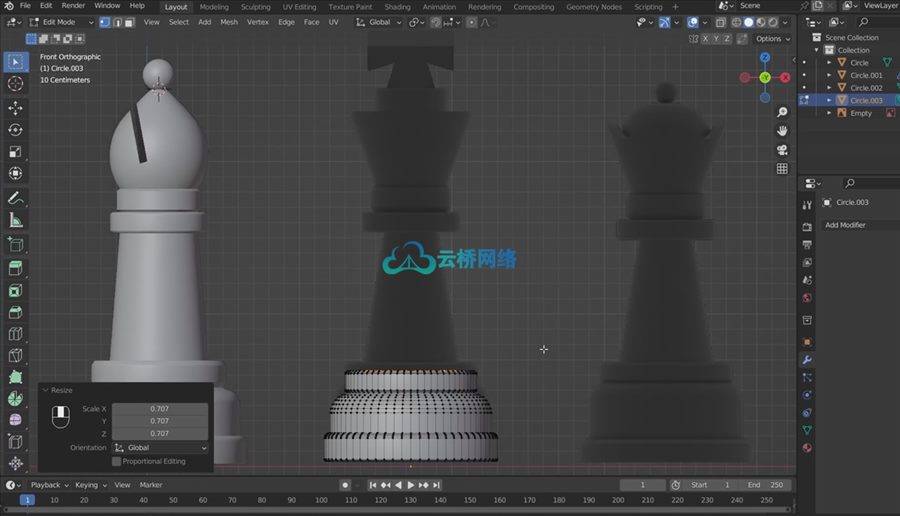
对于这个角色的创建,我们将使用基本的mashe和修饰符。我们将在T型姿势中对角色进行建模,这样我们就更容易制作动画并在以后设置姿势。
首先,我们将从角色的建模开始。一旦我们完成了角色的建模,我们将把它导出为一个fbx文件,这样我们就可以在Mixamo Adobe的在线装配和动画工具中导入它。
一旦我们找到我们最喜欢的动画或姿势,我们将下载它并将其导入Blender。
稍后我们将为闪电添加HDRI图像并应用这些材料。
对于他作为裙子穿的衬衫,我们将使用着色器编辑器中的节点来复制著名的方格衬衫。
对于身体的其他部分,我们将使用基本材料。
最后,我将向您展示如何设置场景和最终渲染设置。
这个课程是初学者友好的,如果你是一个先进的三维艺术家,你可以使用这个课程作为一个实践。
那我们还等什么呢让我们继续看视频吧?
1课程介绍
2导入参考图像和头部建模
3制作头发和小帽子
4添加身体顶部
5建模手
6衬衫、腿和鞋的造型
7最终建模调整和混合
8 HDRI,材质纹理绘制和最终渲染设置
1 Class Introduction
2 Importing Reference Image and Modeling The Head
3 Creating A Hair And Small Hat
4 Adding Top Part Of The Body
5 Modeling Hands
6 Modeling Shirt, Legs And Shoes
7 Final Modeling adjustments And Mixamo
8 HDRI,Materials Texture Painting And Final Render Settings
Duration: 1h 42m | Video: .MP4 1280×720, 30 fps(r) | Audio: AAC, 44100 Hz, 2ch | Size: 0.99 GB
Genre: eLearning | Language: English
Hello guys, my name is Dino, and welcome back to another course. In this course, we are going to model out the popular cartoon character Arnold from the famous 90’s sitcom “Hey Arnold!”.
The show centers on a fourth grader named Arnold, who lives with his grandparents in an inner-city tenement. Episodes center on his experiences navigating urban life while dealing with the problems he and his friends encounter.
Arnold is a calm, nice, kind, optimistic, upbeat, and smart idealist who always sees the best in people despite how unkind or sneaky some of them maybe. Although he’s usually a pacific kid, he has his limits and can be a bit irritable when he’s pushed too far.
First of all, we will import a reference image that you can get from gum.co/ViJhr
For this character creation, we are going to be using basic mashes and modifiers. We will model the character in the T pose from which will be easier for us to animate and set the pose later on.
First of all, we will start with the modeling of our character. Once we finish modeling the character we will export it as an fbx file so that we will be able to import it in Mixamo Adobe’s online rigging and animating tool.
Once we find our favorite animation or pose we will then download it and import it back into Blender.
Later we will add HDRI image for the lightning and apply the materials.
For the shirt that he wears as a skirt, we are going to play with nodes in shader editor to replicate the famous checkered shirt.
For the rest of the body, we will use basic materials.
In the end, I will show you how to set your scene and the final render settings.
This curse is beginner-friendly and if you are an advanced 3d artist you can use this course as a practice.
So what are we waiting for let’s hop on to the videos?
1、登录后,打赏30元成为VIP会员,全站资源免费获取!
2、资源默认为百度网盘链接,请用浏览器打开输入提取码不要有多余空格,如无法获取 请联系微信 yunqiaonet 补发。
3、分卷压缩包资源 需全部下载后解压第一个压缩包即可,下载过程不要强制中断 建议用winrar解压或360解压缩软件解压!
4、云桥CG资源站所发布资源仅供用户自学自用,用户需以学习为目的,按需下载,严禁批量采集搬运共享资源等行为,望知悉!!!
5、云桥CG资源站,感谢您的关注与支持!