

The Gnomon Workshop–Maya和阿诺德的真实感角色外观开发光照、阴影和渲染真实感人像
大小:2.82G 1920X1080 mp4 时长:2小时52分 语言:英语+中英文字幕(云桥CG资源站机译)
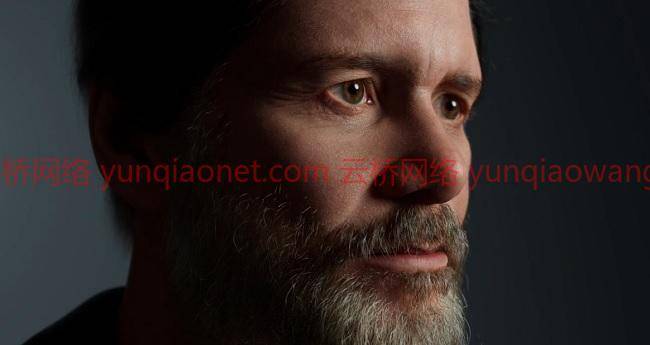
无论是电影、电视剧、音乐视频还是电子游戏,数字人无处不在。这次由赛夫基·易卜拉欣举办的综合研讨会展示了他如何开发数字替身,并介绍了他使用玛雅和阿诺德进行照明、着色和渲染的完整过程。
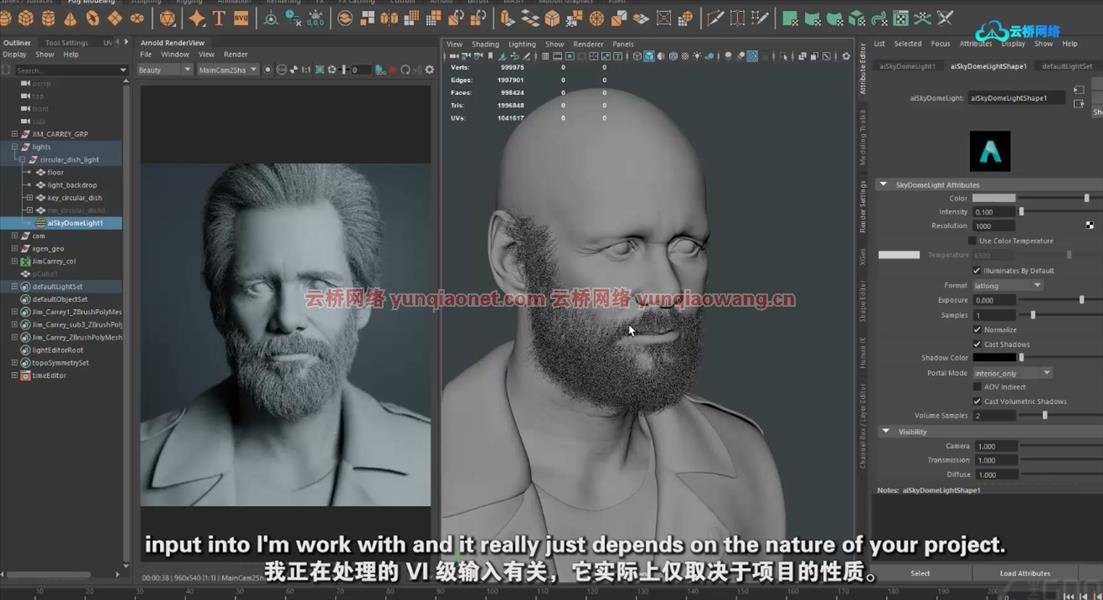
从Maya开始,塞夫基分享了他照亮角色模型的技术,利用区域灯、HDRI地图和挡光板来建立正确的情绪,然后调整相机以实现他的数字替身的最佳相似性。
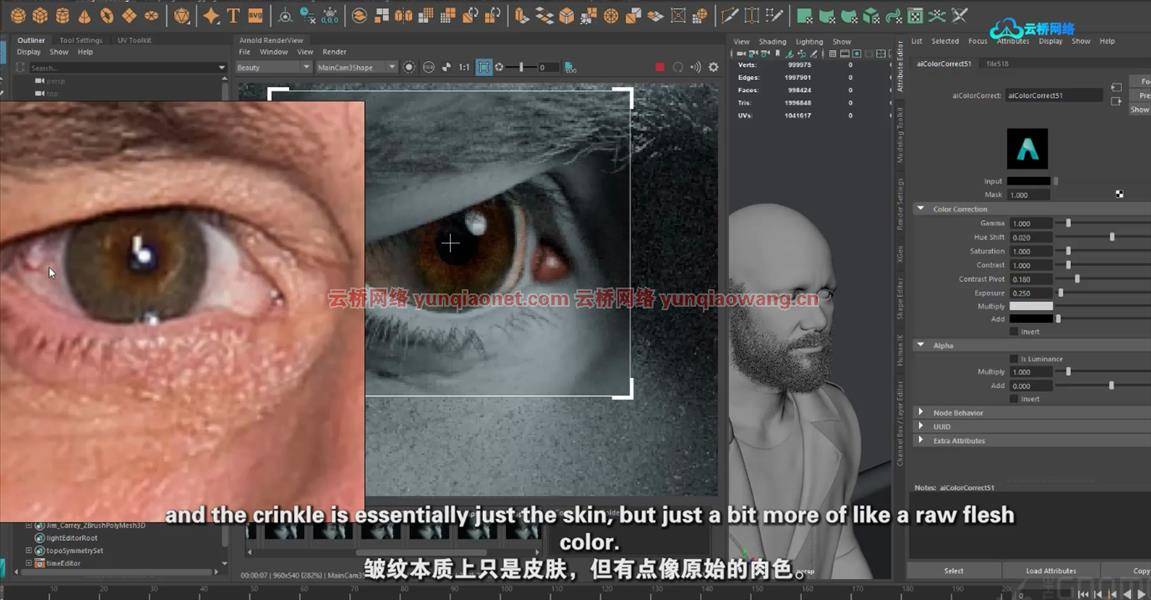
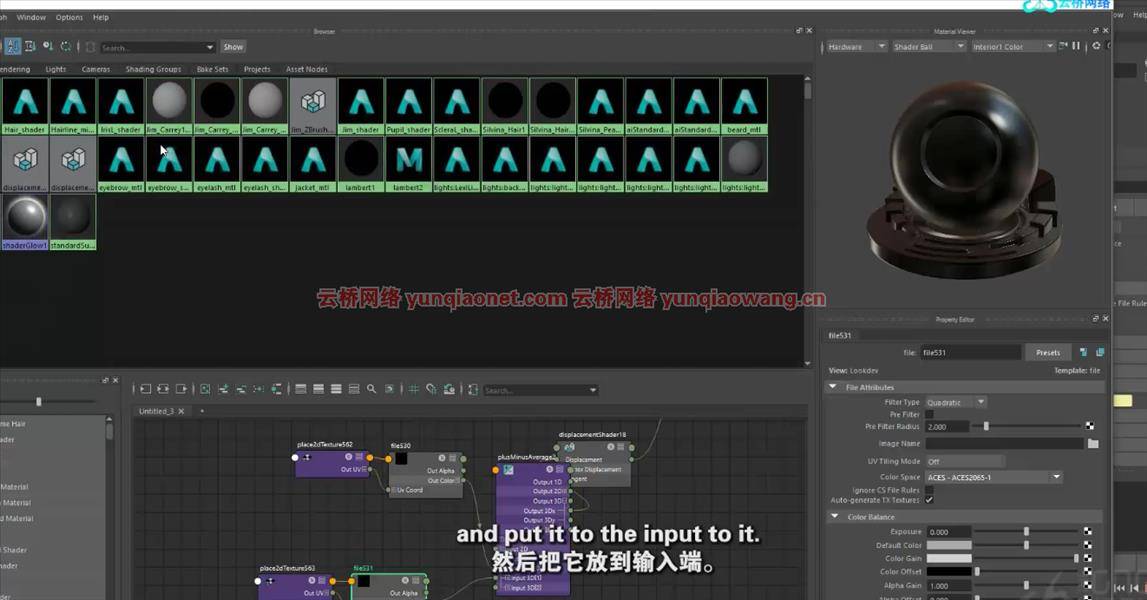
look-dev过程从使用阿诺德标准曲面着色器为眼睛几何图形(包括巩膜、虹膜、瞳孔、肉阜和半月板)设置着色器开始。眼睛就位后,塞夫基演示了如何设置皮肤着色器,插入纹理贴图并微调值以获得逼真的效果。
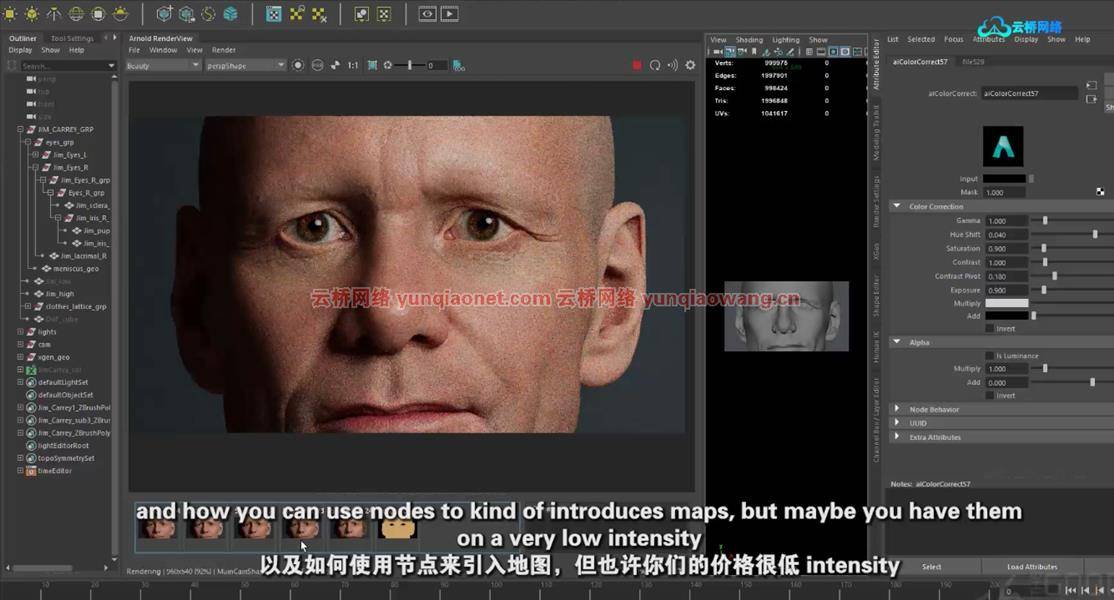
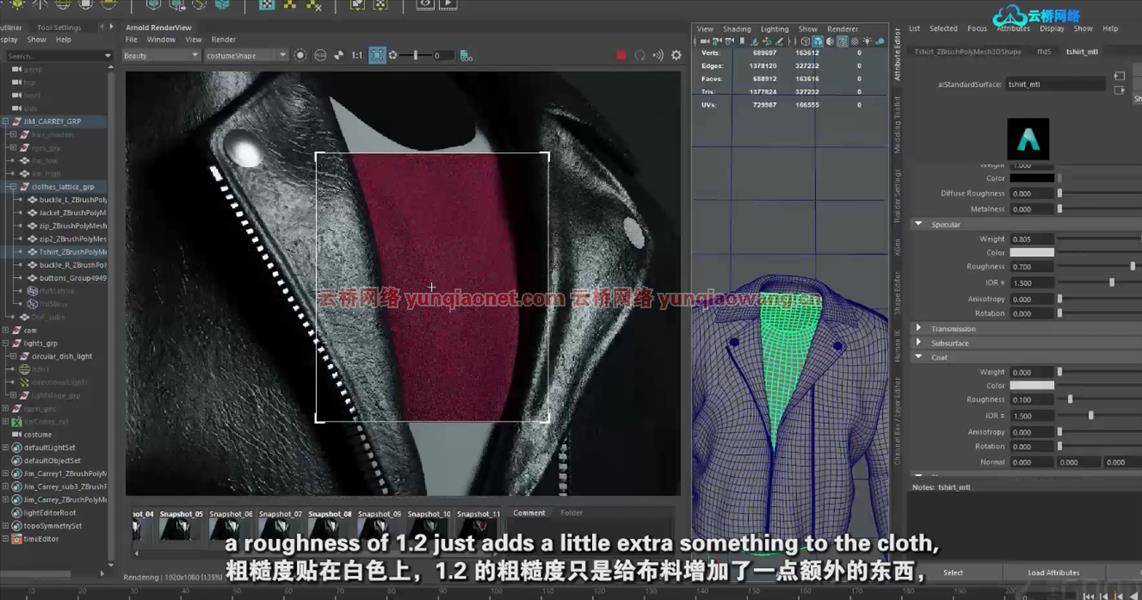
课程从那里发展到一些程序技术,这些技术将使用Hypershade窗口中的特定节点来推动皮肤的外观。最后,本教程以使用阿诺德标准头发着色器为新郎着色,以及为服装设置皮革和棉花材质结束。

The Gnomon Workshop – Photorealistic Character Look Dev In Maya & Arnold Lighting, Shading & Rendering A Photorealistic Portrait
Whether it’s in movies, TV shows, music videos, or video games, digital humans are everywhere. This comprehensive workshop by Sefki Ibrahim demonstrates how he approaches the look development of a digital double, and covers his complete process for lighting, shading, and rendering using Maya and Arnold.
Starting in Maya, Sefki shares his techniques to light the character model, utilizing area lights, HDRI maps, and light blockers to establish the right mood before adjusting the camera to achieve the very best likeness of his digi-double.
The look-dev process begins with the set up of the shaders for the eye geometries, including the sclera, iris, pupil, caruncle, and meniscus, using the Arnold Standard Surface shader. Once the eyes are in place, Sefki demonstrates how to set up the skin shader, plugging in texture maps and fine-tuning values for a photorealistic finish.
The workshop advances from there into some procedural techniques that will push the look of the skin using specific nodes in the Hypershade window. Finally, the tutorial concludes with shading the hair groom using the Arnold Standard Hair shader, as well as setting up a leather and cotton material for the clothing.
1、登录后,打赏30元成为VIP会员,全站资源免费获取!
2、资源默认为百度网盘链接,请用浏览器打开输入提取码不要有多余空格,如无法获取 请联系微信 yunqiaonet 补发。
3、分卷压缩包资源 需全部下载后解压第一个压缩包即可,下载过程不要强制中断 建议用winrar解压或360解压缩软件解压!
4、云桥CG资源站所发布资源仅供用户自学自用,用户需以学习为目的,按需下载,严禁批量采集搬运共享资源等行为,望知悉!!!
5、云桥CG资源站,感谢您的赞赏与支持!平台所收取打赏费用仅作为平台服务器租赁及人员维护资金 费用不为素材本身费用,望理解知悉!


评论(5)
very good
谢谢分享
好好好
感谢分享
感谢分享