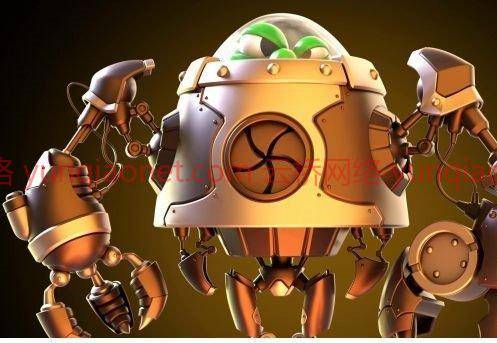
Maya 2020第2卷中的机器人建模与渲染 教程大小 33G 共166小节 含参考图片和HDR素材 语言:英语+机译中文字幕
全面指导建模,纹理,照明和渲染机器人角色在Maya
你将学到什么
如何使用Maya。
如何学习Maya的建模工具。
如何掌握专业造型技巧。
如何在Maya中使用Arnold使用照明和渲染技术。
如何在Photoshop中使用涂饰技术。
要求
激情、兴奋和成为专业数字艺术家的愿望。
Autodesk Maya和Photoshop的副本。
说明
在本课程中,您将学习如何在Autodesk Maya中创建机器人角色。
首先,您将学习如何使用简单的原语来阻止字符。
然后您将学习如何使用四边形绘制工具。这个工具非常强大,它允许你用鼠标点击来创建多边形。此工具使您可以创建任何您喜欢的形状。它允许您添加更多多边形、删除多边形和添加额外的边循环。还有一个松弛功能,可以让你均匀地间隔多边形,给你一个好看的模型。
接下来,您将了解如何在Maya中设置照明。您将学习如何使用SKYDOME灯光,以及如何使用HDRI贴图,这是一种用作光源的高分辨率纹理贴图。
然后您将学习如何创建额外的灯光,以创建一个更有趣的灯光场景,使您的角色看起来更电影和时尚。
最后,您将学习如何设置Arnold渲染,以便创建渲染精美的图像。
之后,您将学习如何在Photoshop中合成图像,以及如何添加背景。
本课程将教您建模的所有原则,如何有效地照明,以及如何在未来的建模和照明项目中有效地使用Maya。
本课程面向的对象:
希望成为电影、游戏和娱乐行业专业人士的学生。
教程目录:
001.简介
002.建模简介
003 Robot 02.jpg
003.图像平面设置
004.挡住头
005.在网格上投影曲线
006.重塑头部
007.四边形绘制工具简介
008.用四边形绘制创建头部第1部分
009.用四边形绘制创建头部第2部分
010.用四边形绘制创建头部第3部分
011.用四边形绘制创建头部第4部分
012.向眼睛几何图形添加深度
013.使用雕刻工具修改眼睑
014.创造头盔
015.创建颈圈零件1
016.创建颈圈零件2
017.创建颈圈零件3
018.创建身体部位1
019.创建身体部位2
020.使用四边形绘制零件1创建几何体
021.使用四边形绘制零件2创建几何体
022.完成胸部面板第1部分
023.完成胸部裁片第2部分
024.完成胸部面板第3部分
025.创建圆形图案填充零件1
026.创建圆形图案填充零件2
027.完成身体部位1
028.完成身体部位2
029.完成身体部分3
030.完成身体部位4
031.向车身添加螺栓
032.创建肩环零件1
033.创建肩环零件2
034.创建肩关节第1部分
035.创建肩关节第2部分
036.创建肩关节第3部分
037.创建肩关节第4部分
038.创建肩关节第5部分
039.创建肩垫零件1
040.创建肩垫零件2
041.创建肩垫零件3
042.创建肩垫零件4
043.创建弯头零件1
044.创建弯头零件2
045.创建弯头零件3
046.创建臂缆第1部分
047.创建臂缆第2部分
048.创建臂缆第3部分
049.创建蟹手第1部分
050.创建蟹手第2部分
051.创建蟹手第3部分
052.创建蟹手第4部分
053.创建蟹手第5部分
054.创建蟹手第6部分
055.创建蟹手第7部分
056.创建蟹手第8部分
057.创建蟹手第9部分
058.创建螃蟹手第10部分
059.创建蟹手第11部分
060.创建螃蟹手第12部分
061.创建蟹手第13部分
062.创建蟹手部分14
063.创建蟹手第15部分
064.创建蟹手部分16
065.创建蟹手部分17
066.创建蟹手部分18
067.创建蟹手部分19
068.创建蟹手部分20
069.创建蟹手部分21
070.创建蟹手部分22
071.创建蟹手部分23
072.创建蟹手部分24
073.创建蟹手部分25
074.创建蟹手部分26
075.创建蟹手部分27
076.创建蟹手部分28
077.创建蟹手部分29
078.向蟹钳添加螺栓第1部分
079.向蟹钳添加螺栓第2部分
080.创造身体环
081.创建内部构件
082.创建护臀器第1部分
083.创建护臀器第2部分
084.创建护臀器第3部分
085.创建护臀器第4部分
086.创建护臀器第5部分
087.创建护臀器第6部分
088.创建护臀器第7部分
089.创建护臀器第8部分
090.创建腹股沟第1部分
091.创建腹股沟第2部分
092.创建腹股沟第3部分
093.创建腹股沟第4部分
094.创建腹股沟第5部分
095.创建髋关节
096.创建腿部第1部分
097.创建腿部第3部分
098.创建腿部第4部分
099.创建腿部第5部分
100.创建腿部零件6
101.创建腿部第7部分
102.创建腿部第8部分
103.创建腿部第9部分
104.创建腿部零件10
105.创建腿部11
106.创建腿部12
107.创建腿部13
108.创建腿部14
109.创建腿部15
110.创建腿部16
111.创建腿部17
112.创建腿部18
113.创建腿部19
114.创建手爪零件1
115.创建爪手零件2
116.创建爪手零件3
117.创建爪手零件4
118.创建爪手零件5
119.创建爪手零件6
120.创建爪手零件7
121.创建爪手零件8
122.创建爪手零件9
123.创建手爪零件10
124.创建手爪零件11
125.创建手爪零件12
126.创建爪手零件13
127.创建爪手部分14
128.创建爪手部分15
129.创建爪手部分16
130.创建爪手部分17
131.创建爪手部分18
132.创建爪手部分19
133.创建爪手零件20
134.创建爪手部分21
135.创建爪手部分22
136.创建爪手部分23
137.创建爪手部分24
138.创建爪手部分25
139.创建爪手部分26
140.创建爪手部分27
141.创建爪形指第1部分
142.创建爪形指第2部分
143.创建爪形指第3部分
144.创建爪形指第4部分
145.创建爪形指第5部分
146.创建爪指零件6
147.创建爪形指第7部分
148.创建爪形指第8部分
149.创建爪形指第9部分
150.创建爪指零件10
151.创建爪指零件11
152.创建爪形指12
153.几何图形的清理、分组和造型
154.设置摄像头
155.使用Hypershade创建材质
156.创建环境遮挡
157.创造金属材料
158.创建高动态范围图像(HDRI)
159.创造玻璃头盔
160.使用表面下散射创建蒙皮
161.创建前后灯
162.为眼睛创造光明
163.创建底部光源
164.最终渲染设置
165.Photoshop中的最终合成
166.概述_创建新渲染
Modeling and Rendering a Robot in Maya 2020 Vol. 2
Comprehensive Guide to Modeling, Texturing, Lighting and Rendering a Robot Character in Maya
What you’ll learn
How to use Maya.
How to learn Maya’s modeling tools.
How to master professional modeling techniques.
How to use lighting and rendering techniques using Arnold in Maya.
How to use finishing techniques in Photoshop.
Requirements
Passion, excitement and the desire to become a professional digital artist.
A copy of Autodesk Maya and Photoshop.
Description
In this course you will lean how to create a robot character in Autodesk Maya.
Firstly, you will learn how to block out the character using simple primitives.
Then you will learn how to use the QUAD DRAW TOOL. This tool is very powerful and it allows you to create polygons with a click of the mouse. This tool enables you to create any shape you like. It allows you to add more polygons, delete polygons, and add extra EDGE LOOPS. There is also a RELAX function that allows you to space the polygons evenly, giving you a great looking model.
Next, you will earn how to set up the lighting in Maya. You will learn how to use the SKYDOME light, and how to use a HDRI map, which is a high resolution texture map that acts as a light source.
Then you will learn how to create extra lights to create a more interesting lighting scenario, making your character look more cinematic and stylish.
Finally, you will learn how to set up the Arnold render so you can create beautifully rendered images.
Then afterwards, you will learn how to composite the image in Photoshop, and how to add a background.
This course teaches you all the principles of modeling, how to light efficiently, and how to use Maya effectively for your future modeling and lighting projects.
Who this course is for:
Students who want to become industry professionals in the film, game, and entertainment business.
1、登录后,打赏30元成为VIP会员,全站资源免费获取!
2、资源默认为百度网盘链接,请用浏览器打开输入提取码不要有多余空格,如无法获取 请联系微信 yunqiaonet 补发。
3、分卷压缩包资源 需全部下载后解压第一个压缩包即可,下载过程不要强制中断 建议用winrar解压或360解压缩软件解压!
4、云桥CG资源站所发布资源仅供用户自学自用,用户需以学习为目的,按需下载,严禁批量采集搬运共享资源等行为,望知悉!!!
5、云桥CG资源站,感谢您的赞赏与支持!平台所收取打赏费用仅作为平台服务器租赁及人员维护资金 费用不为素材本身费用,望理解知悉!