

时长:2小时38分|视频:H264 1280×720 语言:英语+中文字幕(云桥CG资源站 机译)+原英文字幕 |大小: 1.79 GB |
你想成为一个真正的艺术家,为3D对象和场景创建纹理,图案和材料吗?你是否希望能够创建纹理,然后可以轻松地进行编辑和调整?你想在Blender中完成这一切吗?
那么你可以在本课程中使用Blender中的节点系统在Blender中创建程序化的材质和纹理。程序化的意思是创建一些可以在任何时候以任何方式自由调整的东西。一个程序化的纹理就可以让它的颜色、图案和形状都得到实时调整,让你作为艺术家有能力为你的项目创造出无限多的潜在材质。
在BailylDesign,我们的目标是给你提供最好的内容和资源,让你学习CG行业的新技能,我们希望通过这门课程给你提供所需的工具,让你建立自己独特的纹理组合,应用在你的项目中,无论是个人还是专业目的。
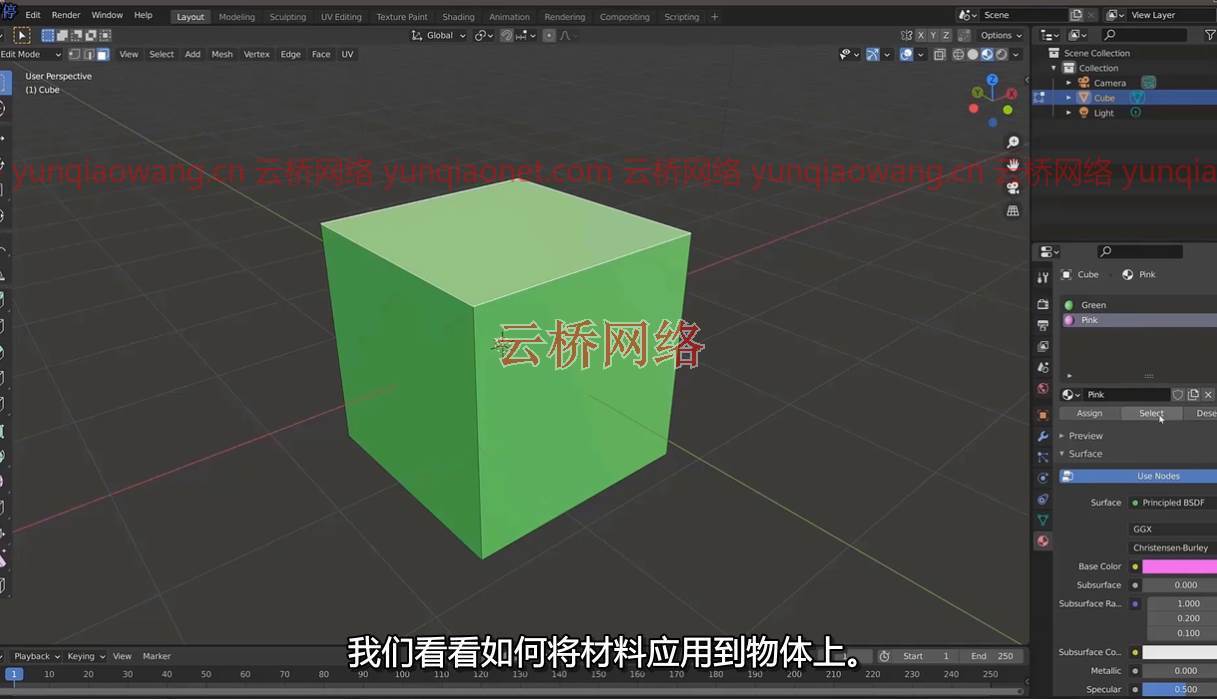
我们从最开始学习将基本材料应用于对象的过程,以及对象及其材料之间的关系。
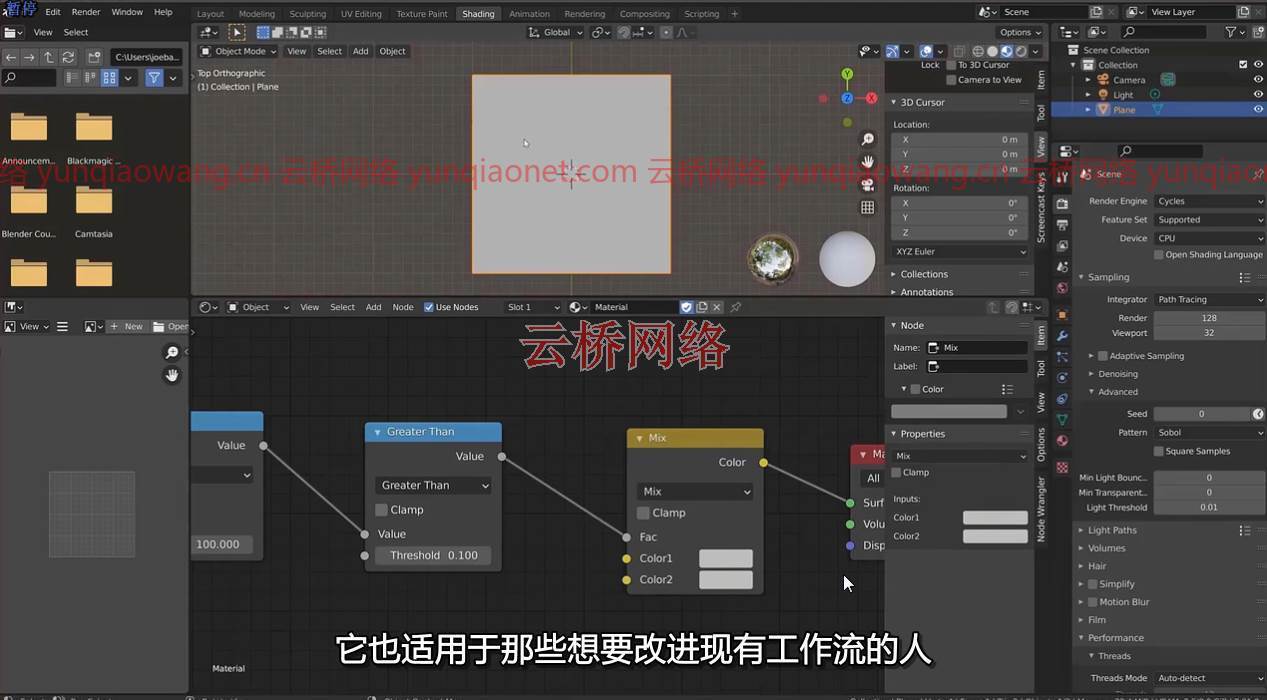
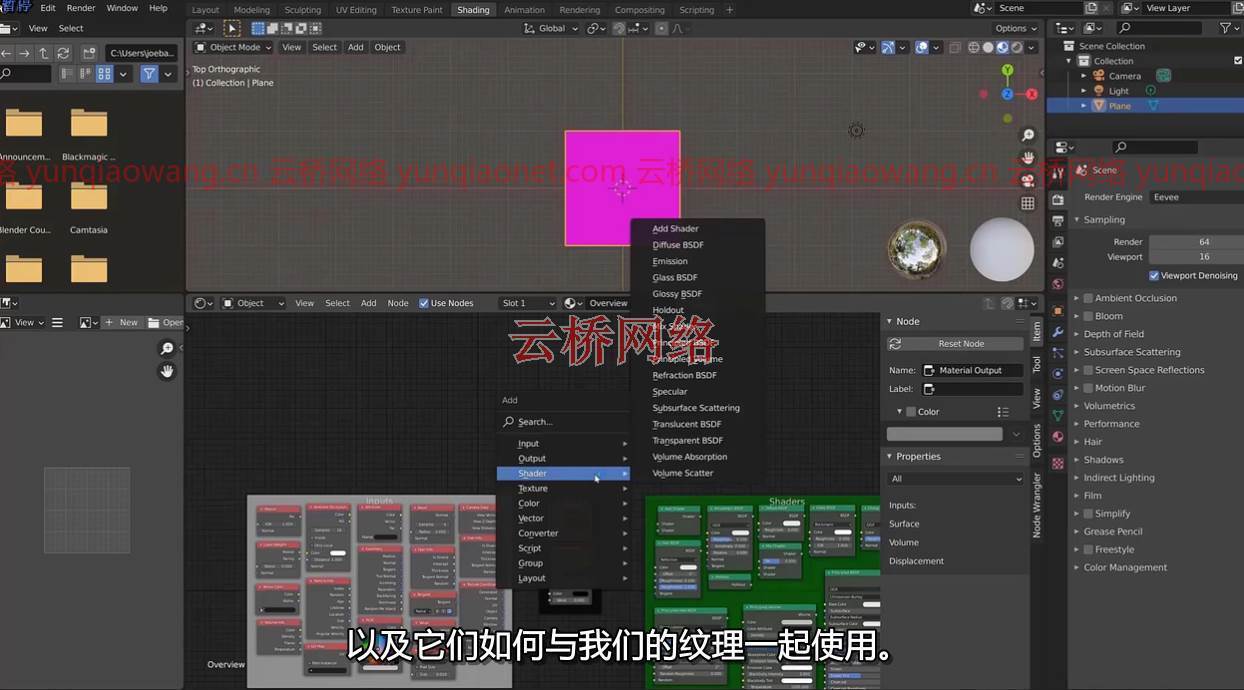
但不久之后,我们就会深入到Blenders令人难以置信的强大节点系统中。在这里,我们学习如何构建节点树,让我们在如何接近材质创作时有无限的自由。
如果你担心无法掌握特定的节点,不用担心。在本课程中,每一个介绍的节点都会以各种不同的方式被多次使用,让你作为学员能够扎实掌握该节点的工作原理。
课程目录:
01-欢迎来到班级。
02-材料应用基础
03-将材料应用到其他物体上。
04-假的用户和复制的材料
05-访问_着色器编辑器
06-节点的概述。
07-介绍_纹理坐标节点。
08-合并_结点_合在一起
09-创设一条对角线
10-使用电源功能
11-用mixrgb来添加颜色。
12-控制轴_线的控制
13-创建一条垂直线
14-将一条线变成一个方块的方法
15制作十字形的方法
16-使用_值节点控制多个节点
17-使用_动力节点来创建一个parabla。
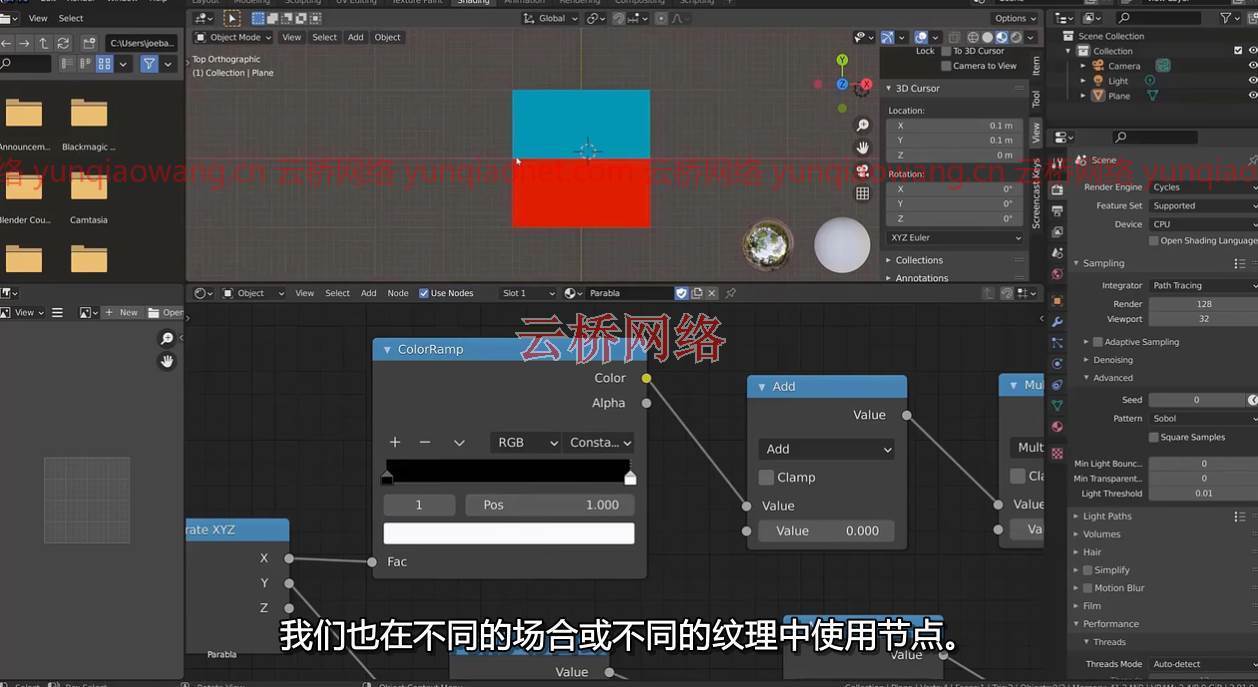
18-颜色渐变
19-创建一个圆圈。
20-把我们的圆变成圆环
21-一秒钟的做事方法
22-介绍_绝对函数_创造钻石的方法。
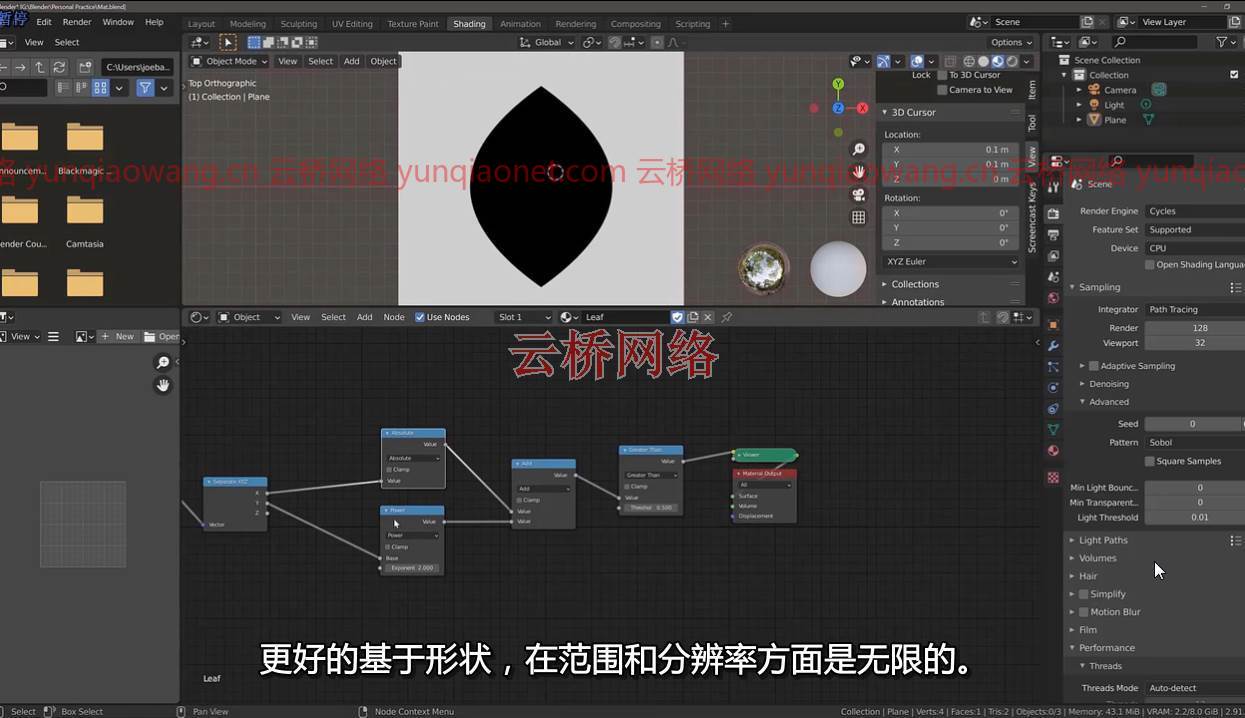
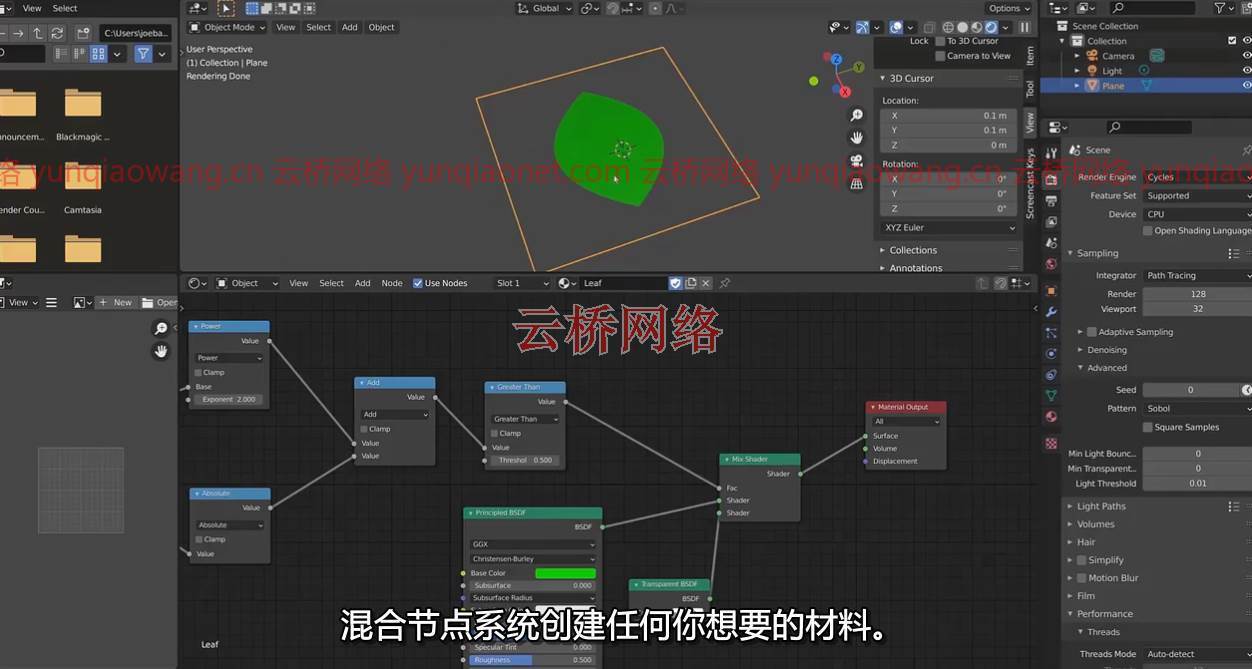
23-使用以前形状的节点来创建一个叶子。
24-混合着色器到创建透明度
25-课程结束挑战
Joe Baily | Duration: 2h 38m | Video: H264 1280×720 | Audio: AAC 44,1 kHz 2ch | 1,71 GB | Language: English
Do you want to become a true artist by creating textures, patterns and materials for 3D objects and scenes? And do you want to be able to create textures that can then be edited and adjusted with ease? And you want to do it all inside Blender?
Procedural Texturing For Materials In Blender 2.9: Create Any Material Or Texture That You Want
Well you can in this course on using the node system in blender to create procedural materials and textures in Blender. Procedural means to create something that can be freely adjusted at any time in any way. A procedural texture then can have its colors, patterns and shapes all adjusted in real time, giving you as the artist the ability to create a limitless number of potential materials for your projects.
At BailylDesign, our goal is to give you the best possible content and resources for learning new skills in the CG industry, and with this course we hope to give you the tools you need to build your own unique portfolio of textures to apply in your projects, whether it be for personal or professional purposes.
We start off at the very beginning learning about the process of applying basic materials to objects, as well as the relationships between objects and their materials.
But before long we dive into Blenders incredibly powerful node system. Where we learn how to construct the node trees that give us infinite freedom in how we approach material creation.
If you are concerned about not being able to master specific nodes, don’t worry. In this course every node introduced is used various times, in various different ways, allowing you as the student to get a solid grasp on how that node works.
01-welcome_to_the_class
02-the_basics_of_material_application
03-applying_materials_to_other_objects
04-fake_users_and_duplicating_materials
05-accessing_the_shader_editor
06-an_overview_of_the_nodes
07-introducing_the_texture_coordinate_node
08-combining_nodes_together
09-creating_a_diagonal_line
10-using_the_power_function
11-adding_color_with_the_mixrgb
12-controlling_the_axis_of_the_line
13-creating_a_vertical_line
14-turning_a_line_into_a_square
15-making_a_cross_shape
16-using_the_value_node_to_control_multiple_nodes
17-using_the_power_node_to_create_a_parabla
18-the_color_ramp
19-create_a_circle
20-turning_our_circle_into_a_torus
21-a_second_way_of_doing_things
22-introducing_the_absolute_function_to_create_a_diamond
23-using_nodes_from_previous_shapes_to_create_a_leaf
24-mixing_shaders_to_create_transparency
25-end_of_class_challenge
1、登录后,打赏30元成为VIP会员,全站资源免费获取!
2、资源默认为百度网盘链接,请用浏览器打开输入提取码不要有多余空格,如无法获取 请联系微信 yunqiaonet 补发。
3、分卷压缩包资源 需全部下载后解压第一个压缩包即可,下载过程不要强制中断 建议用winrar解压或360解压缩软件解压!
4、云桥CG资源站所发布资源仅供用户自学自用,用户需以学习为目的,按需下载,严禁批量采集搬运共享资源等行为,望知悉!!!
5、云桥CG资源站,感谢您的赞赏与支持!平台所收取打赏费用仅作为平台服务器租赁及人员维护资金 费用不为素材本身费用,望理解知悉!
6、For users outside China, if Baidu Netdisk is not convenient for downloading files, you can contact WeChat: yunqiaonet to receive a Google Drive download link.


