

雕塑精确的解剖,纹理和新郎现实的动物为您的投资组合
你会学到什么
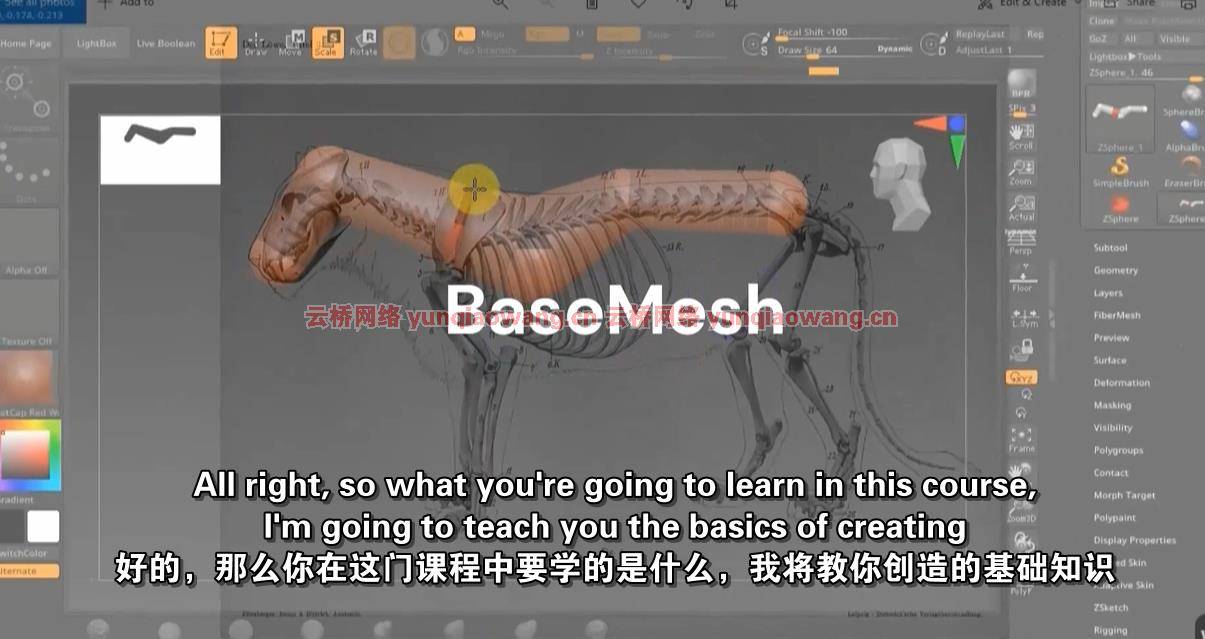
用ZSphere雕刻基本的老虎骨骼
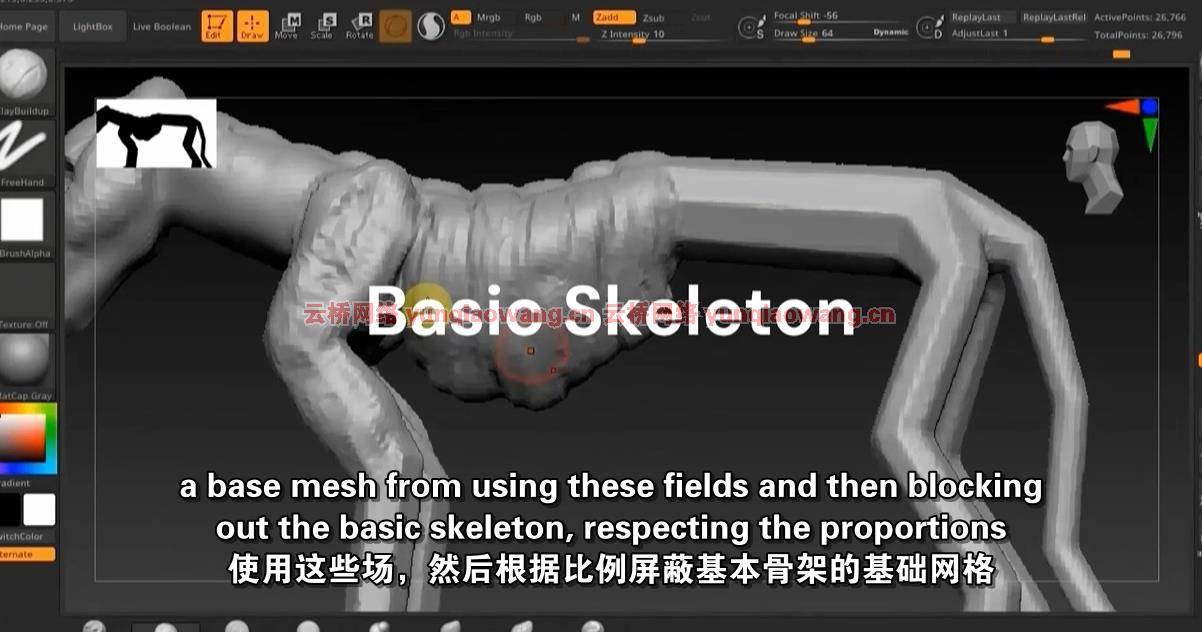
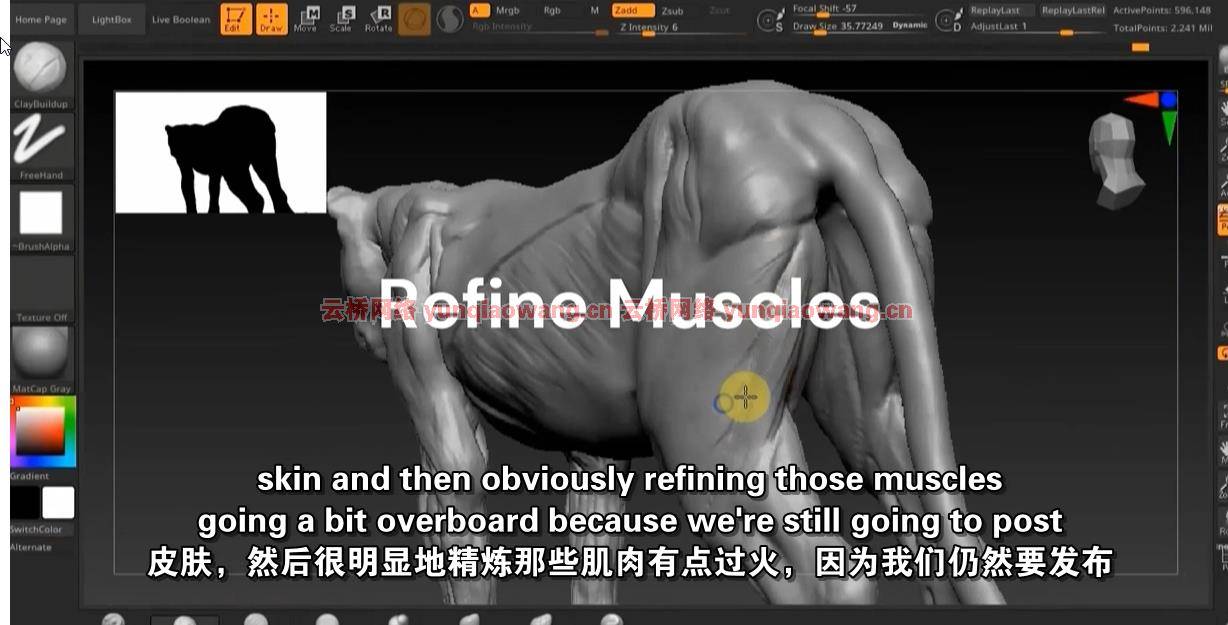
雕刻主要的表层肌肉
在顶部添加皮肤和脂肪层
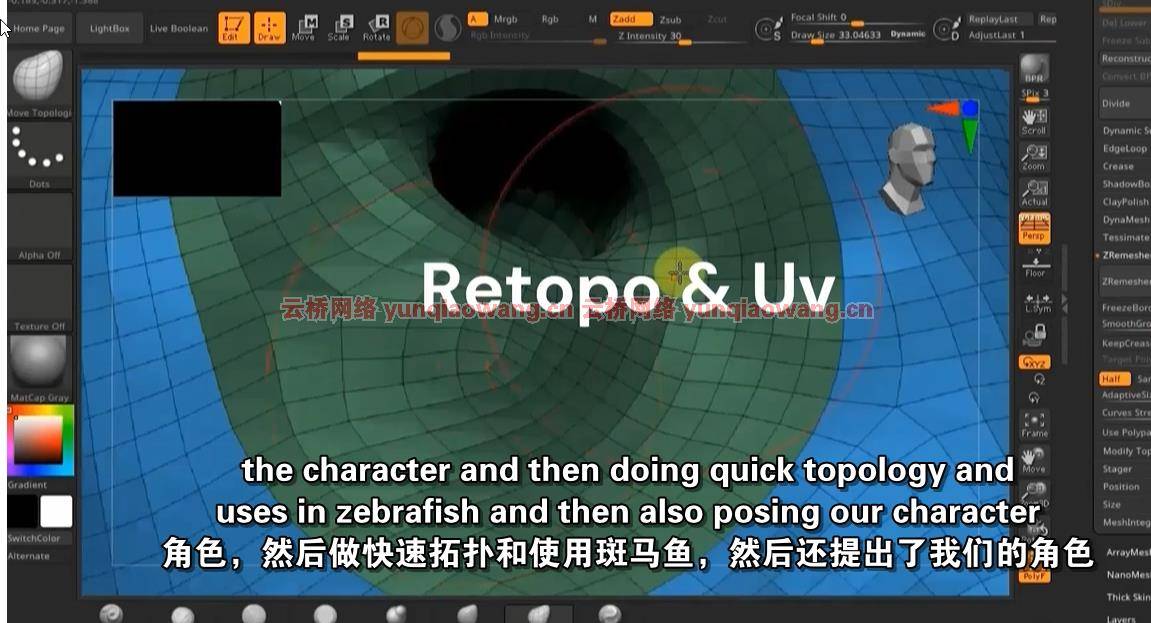
使用ZRemesher & PolyGroups快速重建拓扑
ZBrush中的快速UV展开
给我们的动物摆姿势
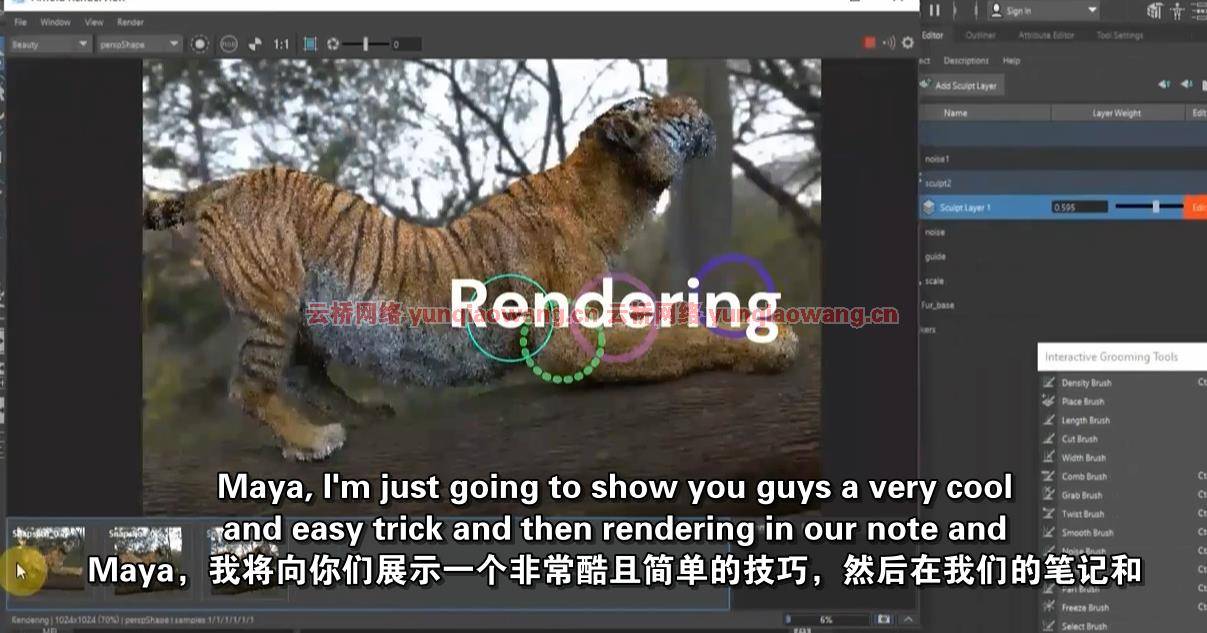
在Xgen中整理并在Maya/Arnold中渲染
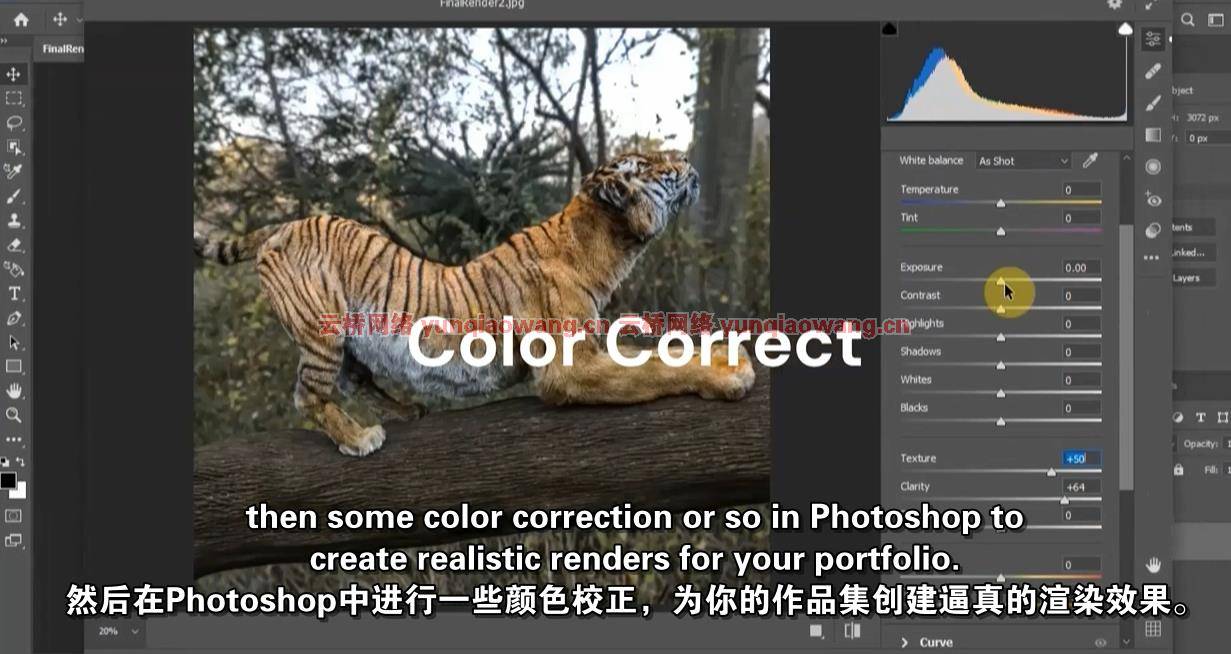
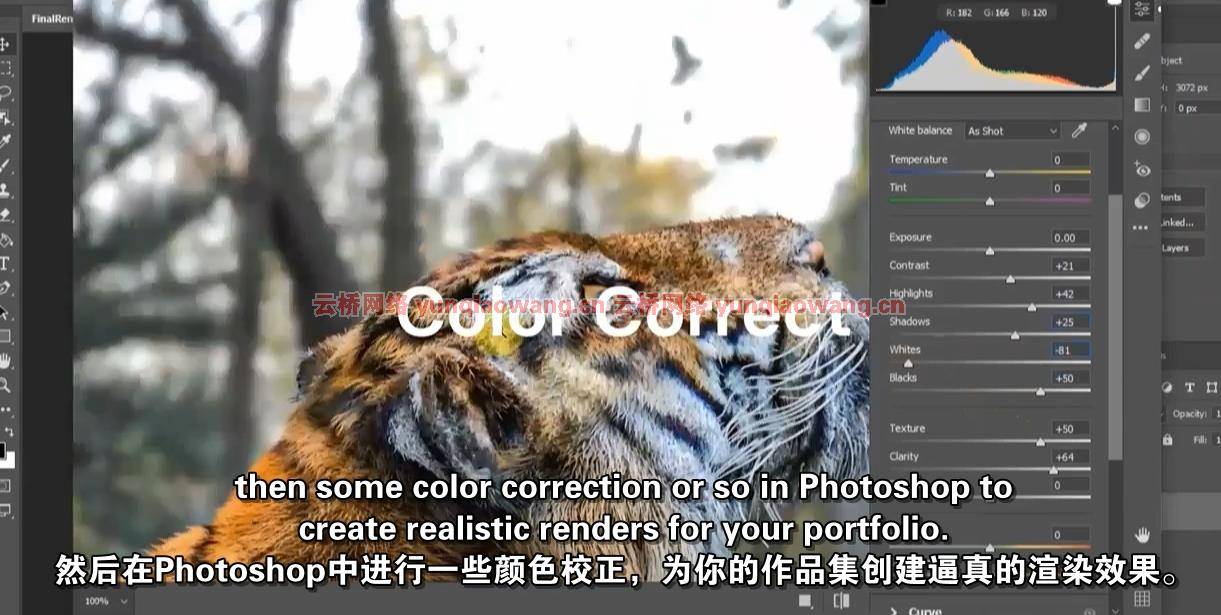
Photoshop中的色彩校正
MP4 |视频:h264,1280×720 |音频:AAC,44.1 KHz,2声道
语言:英语+中英文字幕(云桥CG资源站机译) |时长:56节课(19小时45分钟)|大小解压后:17.1 GB 含课程文件
要求
这个课程不是为Zbrush & Maya的绝对初学者设计的。
我希望你有一些基本的ZBrush,Maya和Photoshop的经验。
你应该在电脑上安装了Zbrush,Maya & Photoshop。
描述
你在ZBrush中雕刻逼真的动物有问题吗?
尝试在网上搜索一步一步的教程,但仍然没有运气?
那么我欢迎你来到Nexttut教育公司为初学者开设的动物解剖雕塑课..
你为什么要向我学习
我叫Adrian Krokodil,有一点医学背景,我创建了一家名为SA Anatomy的公司,在那里我已经在ZBrush教授人体和动物解剖学很多年了。自从我在全球范围内提供3D解剖模型以来,精确性和准确性对我来说一直是必须的。
本课程结束时,您将能够,
为艺术家理解动物解剖学的基础,
雕塑、纹理和修饰逼真的动物
我会学到什么
用ZSphere雕刻基本的老虎骨骼
雕刻主要的表层肌肉
在顶部添加皮肤和脂肪层
使用ZRemesher & PolyGroups快速重建拓扑
ZBrush中的快速UV展开
给我们的动物摆姿势
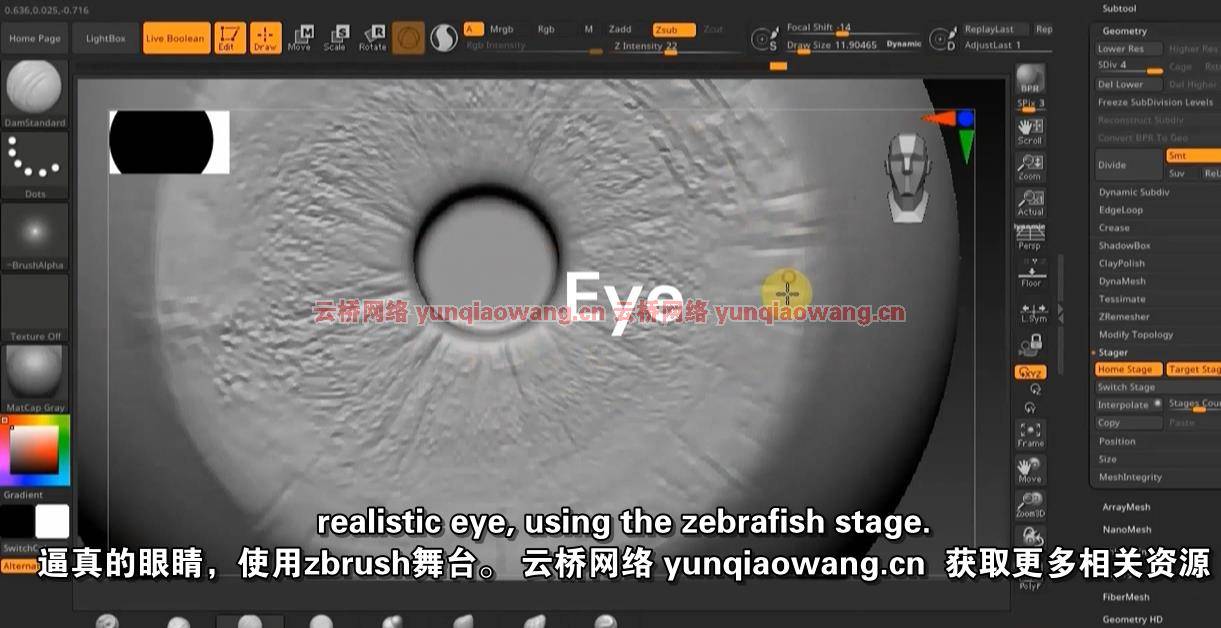
制作支架和眼部零件
画我们的雕塑
导出Maya所需的所有贴图和文件
在Xgen中整理并在Maya/Arnold中渲染
Photoshop中的色彩校正

课程项目
我们将从定制我们的Zbrush开始,这样我们可以更快更有效地工作。然后,我们将使用我们的ZSphere来屏蔽基本框架。
然后,在我们的比例到位后,我们将开始阻塞我们的肌肉。然后我们将在顶部雕刻皮肤和脂肪层(还没有细节)。之后,我们将使用polygroups & guides对我们的模型做一个快速的zremesher,这并不是说我们的模型将为游戏做好准备,这只是为了让我们得到体面的类型学(手动重建总是被推荐)。
然后,我们将为我们的动物雕塑一个支架,以帮助最好地展示我们的作品组合&塑造眼睛。然后我们将在ZBrush中进行快速UV(同样没有准备好生产)。
然后,我们将我们的动物摆一个特定的动态姿势。
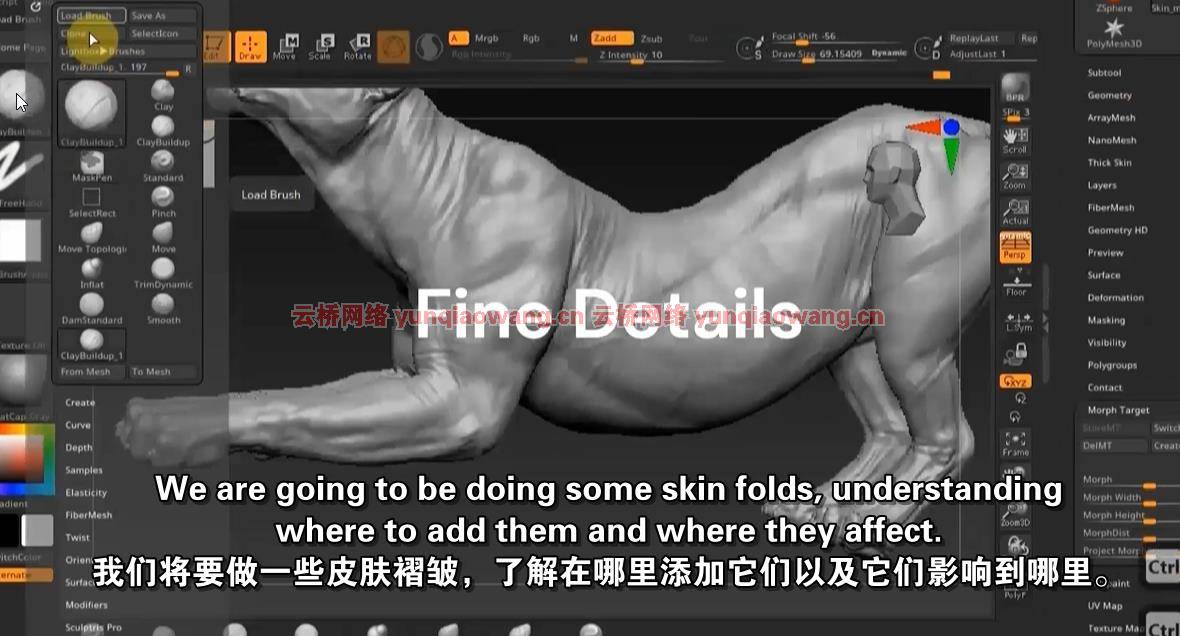
然后,我们将雕刻一些精细的细节(我们不会太关心动物,因为它会被毛皮覆盖)。然后,我们将使用ZBrush spotlight为我们的雕塑上色(这也将作为我们新郎的向导)。我们将使用multimap exporter导出maya所需的贴图和文件。然后我们将在maya xgen中梳理我们的动物,
然后用MtoA为我们的渲染设置一个快速场景。最后,我们将在Photoshop中为我们的渲染做一些快速的颜色校正。
这个课程适合我吗
我为初级雕塑家设计了这个课程,他们想在ZBrush中雕刻解剖学上正确的动物,但他们很挣扎,因为他们没有找到一个循序渐进的教程,没有快进,没有跳过,并且来自一个已经做了多年的人类和动物解剖艺术家。
这门课程也是为那些想要在Maya中梳理和渲染现实动物的基础知识的艺术家开设的。
本课程不是为Zbrush & Maya的绝对初学者用户设计的。
我应该知道些什么或者吃些什么
我希望你有一些基本的ZBrush,Maya和Photoshop的经验。
你应该在电脑上安装了Zbrush,Maya & Photoshop。
现在加入我吧
所以,如果你想在ZBrush中雕刻逼真的动物,那么现在就加入我吧,让你的技能更上一层楼。希望能在课程中见到你。
这门课程是给谁的
这门课程也是为那些想要在Maya中梳理和渲染现实动物的基础知识的艺术家开设的。
我为初级雕塑家设计了这个课程,他们想在ZBrush中雕刻解剖学上正确的动物,但他们很挣扎,因为他们没有找到一个循序渐进的教程,没有快进,没有跳过,并且来自一个已经做了多年的人类和动物解剖艺术家。
Sculpt accurate anatomy, texture & groom realistic animals for your portfolio
What you’ll learn
Sculpting the basic tiger skeleton with ZSphere
Sculpting the major superficial muscles
Adding skin & fat layer on top
Quick retopology using ZRemesher & PolyGroups
Quick UV unwrap in ZBrush
Posing our animal
Groom in Xgen & render in Maya/Arnold
Color Correction In Photoshop
Requirements
This course is not designed for absolute beginner Zbrush & Maya users.
I expect you to have some sort of basic ZBrush, Maya & Photoshop experience.
You should have Zbrush, Maya & Photoshop installed on your computer.
Description
Do you have problems sculpting realistic animals in ZBrush?
Tried searching for a step by step tutorial online but still no luck?
Then I welcome you to Nexttut education’s Animal Anatomy Sculpting for Beginners..
WHY SHOULD YOU LEARN FROM ME
My name is Adrian Krokodil and with a bit of medical background I founded a company called SA Anatomy where I have been teaching human & animal anatomy in ZBrush for many years now. Precision & Accuracy has been always mandatory for me since I supply 3D Anatomical models around the globe.
BENEFITS
By the end of this course, you’ll be able to,
Understand the fundamentals of animal anatomy for artists,
Sculpt, texture & groom realistic animals
WHAT WILL I LEARN
Sculpting the basic tiger skeleton with ZSphere
Sculpting the major superficial muscles
Adding skin & fat layer on top
Quick retopology using ZRemesher & PolyGroups
Quick UV unwrap in ZBrush
Posing our animal
Making a stand & eye parts
Polypaint our sculpts
Export all the required maps & files for Maya
Groom in Xgen & render in Maya/Arnold
Color Correction In Photoshop
COURSE PROJECTS
We will start by customizing our Zbrush so we can work much faster and efficiently. Then we’ll use our ZSphere to block out the basic skeleton. Then after our proportions are in place we’ll start blocking our muscles. Then we will sculpt the skin & fat layer on top(without the fine details yet). After that we will do a quick zremesher on our model using polygroups & guides, this is not to say our model will be game ready, it’s just for us to get decent typology(Manual retopology is always recommended). We’ll then sculpt a stand for our animal to help best present our art for our portfolio & model the eyes. Then we’ll do quick UV’s in ZBrush(Again not production ready).Then we’ll pose our animal to a specific dynamic pose. Then we’ll sculpt some fine details(We’ll not be too concerned about the animal as it will be covered in fur). Then we’ll polypaint our sculpts using ZBrush spotlight (which we’ll also serve as guides for our groom). We’ll use the multimap exporter to export the required maps & files for maya. Then we’ll groom our animal in maya xgen then set up a quick scene for our renders with MtoA. Then lastly we’ll do some quick color correction for our render in Photoshop.
IS THIS COURSE RIGHT FOR ME
I have designed this course for beginner sculptors, who want to sculpt anatomically correct animals in ZBrush but they struggle because they don’t find a tutorial which is step by step, no fast forward, no skip and coming from a human & animal anatomy artist who’s been doing this for years.
The course is also for artists who want basic knowledge in grooming & rendering realistic animals in Maya.
WHO IS NOT THE IDEAL STUDENT
This course is not designed for absolute beginner Zbrush & Maya users.
WHAT SHOULD I KNOW OR HAVE FOR THE COURSE
I expect you to have some sort of basic ZBrush, Maya & Photoshop experience.
You should have Zbrush, Maya & Photoshop installed on your computer.
JOIN ME NOW
So if you want to sculpt realistic animals in ZBrush, then join me now, and take your skills to the next level. Hope to see you in the course.
Who this course is for
The course is also for artists who want basic knowledge in grooming & rendering realistic animals in Maya.
I have designed this course for beginner sculptors, who want to sculpt anatomically correct animals in ZBrush but they struggle because they don’t find a tutorial which is step by step, no fast forward, no skip and coming from a human & animal anatomy artist who’s been doing this for years.
1、VIP会员仅需30元全站资源免费下载!
2、资源默认为百度网盘链接,请用浏览器打开输入提取码不要有多余空格,如无法获取 请联系微信 yunqiaonet 补发。
3、分卷压缩包资源 需全部下载后解压第一个压缩包即可,下载过程不要强制中断 建议用winrar解压或360解压缩软件解压!
4、云桥CG资源站所发布资源仅供用户自学自用,用户需以学习为目的,按需下载,严禁批量采集搬运共享资源等行为,望知悉!!!
5、云桥CG资源站,感谢您的赞赏与支持!平台所收取打赏费用仅作为平台服务器租赁及人员维护资金 费用不为素材本身费用,望理解知悉!平台资源仅供用户学习观摩使用 请下载24小时内自行删除 如需商用请支持原版作者!请知悉并遵守!
6、For international users: If you do not have a Baidu Netdisk VIP account, please contact WeChat: yunqiaonet for assistance with logging into Baidu Netdisk to download resources..


评论(9)
资源不错
谢谢
好
资源不错!
资源不错